Monday, June 29, 2015

Gonna Eat This Camping Trip!: Part 2


Alright alright, the big topic I have right now is FOOD!  When going camping there are a few supplies you will always need to take with you.  When my family goes camping we make a list of what we need and go on a shopping trip to buy all sorts of goodies to take with us.  It was always one of my favorite parts.

I really don't have any food for my doll, so I decided to start with some of the staple things I figured I would want on a camping trip.  I even have some PDFs for you if you want to make some of the same things!  I will provide a colored version, along with an outlined version if you want to color them yourself.

I had a ton of fun with these and I will try to give you the tips and tricks I learned while putting some of them together!  And this is part one of two!  I made so much food I thought I would separate it into two posts!

Chocolate Bars


Colored PDF Version / Outlined PDF Version

No camping trip is complete with out some yummy chocolate bars to make some s-mores!  As you can see I chose to print the outlined version and color them myself.  I love to color and didn't have colored ink, so it worked, but if you want to use the colored version go on ahead!

I made these chocolate bars by putting a layer of clear tape over the pictures and cutting them out.  I then got some tin foil and wrapped it around a piece of dark brown foam.  I put the foil wrapped foam inside of the cover and glued it shut.  You could always tape it as well, in case you want to open later.

Graham Crackers

Here is the Graham crackers box.  I colored the template and then cut it out.  I glued it onto the paperboard and let the glue dry completely before cutting it.  I scored the edges on the inside where I was going to bend them, and then hot glued the sides together.  I then coated the entire little box in Mod-Podge to make it stronger.  I did probably three or four coats, I wanted mine to stay around for a while.


I made some paper version of graham crackers too!  For the bigger blocks of graham crackers, I started by coloring the template, and then coated it with clear tape (I found some at the dollar store!).  When taping I tried to stay clear of the small tabs.  I cut out the templates and then glued them together.  For the small single pieces, I colored, taped, and then cut out the templates.  I simply glued them together.  Easy graham crackers!

Colored PDF Version / Outlined PDF Version

Marshmallows


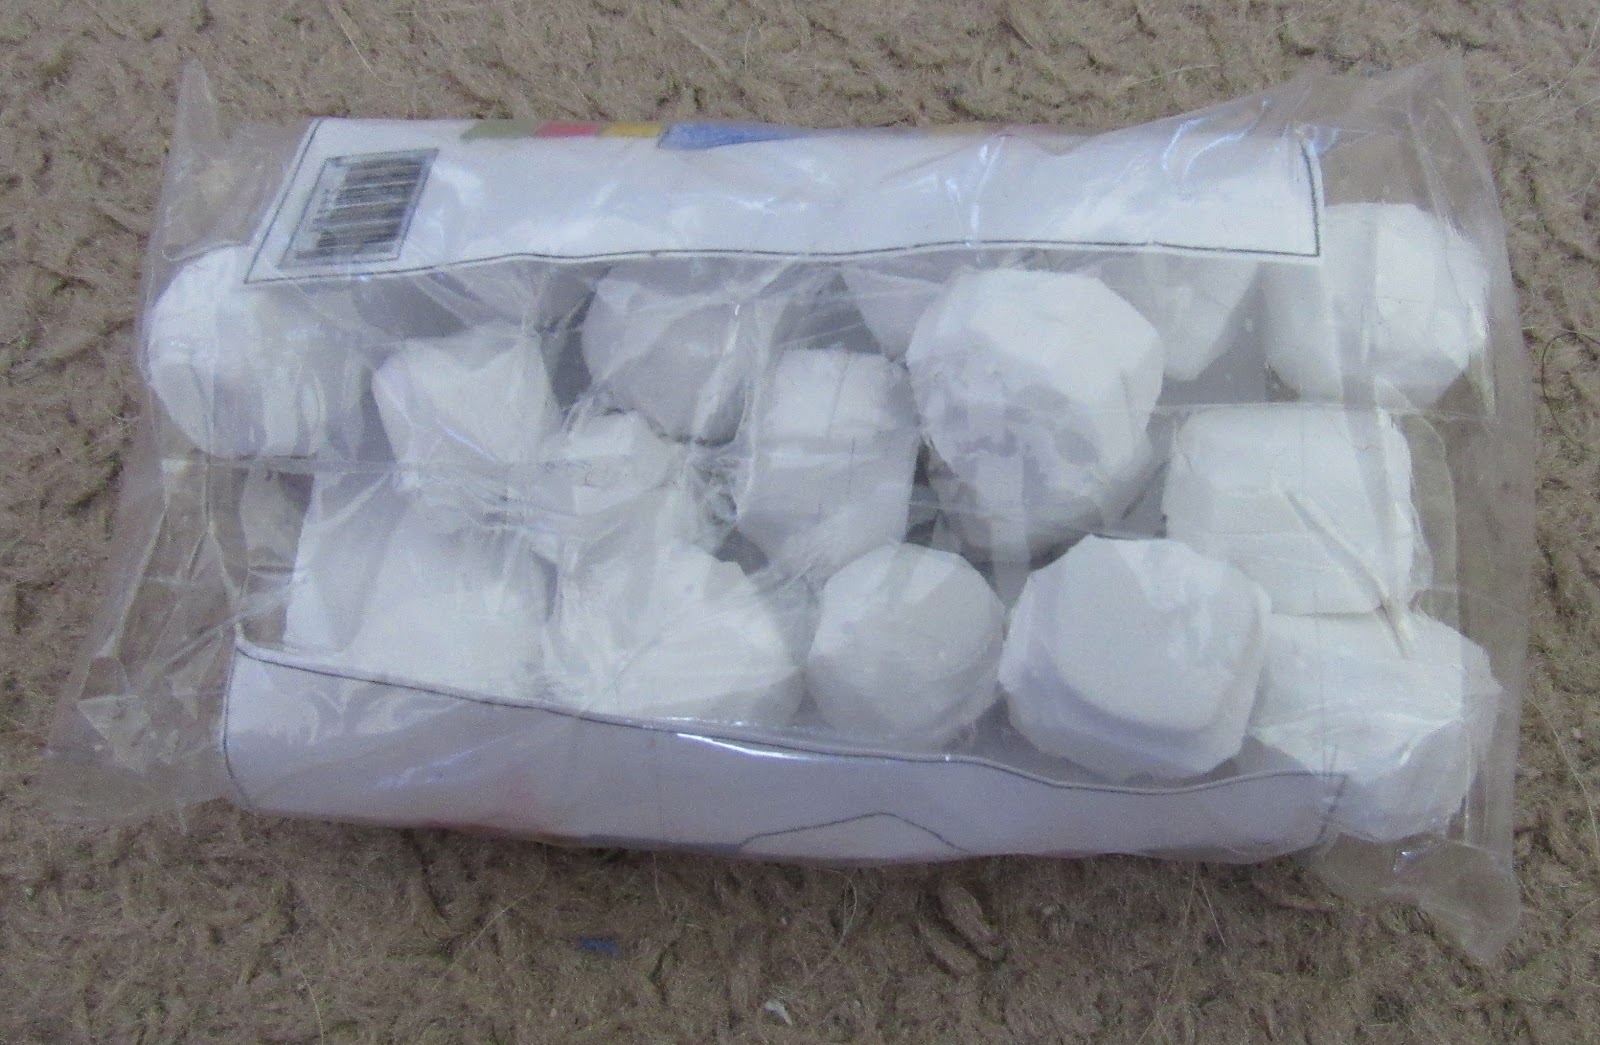
This was fun!  I had been trying to figure out what to make the marshmallows out of, and then I realized I had some thick white foam and thought it would be perfect.


I cut out several squares and glued two of them together.  I put some books on top of them to make sure they glued together and stuck well.  After they were dry, I just cut around the edges and made them look more circular.


To make the bag, I used the bag pattern and cut out a piece of plastic bag (Ziploc or any brand).  I folded the bag in half and taped it.  I had it so the taped edge was in the bag and taped one of the sides.  I added the marshmallows I made and taped the other side closed.  Now you have a bag of marshmallows!


Colored PDF Version / Outlined PDF Version

S-mores

Now that we have all of our s-mores supplies we need to make the s-mores!  I used foam to make them.  I cut out squares of tan foam and made indents in them.  I then cut out pieces of chocolate to look similar to the chocolate bars I made.  Then I cut pieces out of the thick foam I have and shaped it to resemble a marshmallow.

You can use the paper graham crackers as well!  I was going to make some with paper, but I didn't get around to it.

Soda Box & Cans


When I go camping we always make sure to bring enough soda.  It's our drink of choice while we out in the great outdoors, kinda silly, but tradition.  I made a box that really holds the cans!


The box was pretty easy to make, just as before with the graham cracker box, I colored the template and then cut it out, but not perfectly.  I glued it to the paper board and since this one was bigger, I put a few books on top to make it flat.  After it was completely dry, I cut it out along the lines and then hot glued the sides together.  I again Mod-Podged (or clear glue) the entire thing, with three or four coats again.


Box: Colored PDF Version / Outlined PDF Version


I made six cans, which meant I printed the template for the cans twice.  I then colored the template and coated it with taped.  Next I grabbed a toothpick and started to roll some scrap paper I had that was the height as the can templates.  I kept rolling until it was the size I needed to be able to wrap the can template around the roll.  I glued the top and bottoms of the can on with hot glue and they are complete!


Cans: Colored PDF Version / Outlined PDF Version / Colored PDF Version (This version doesn't have the extra space with color in it)

If you have any questions, don't hesitate to leave a comment!  And that is all I have for part two!  Stay tuned for part three soon!

Have a wonderday!

Thursday, June 25, 2015

Springfield Shoes!

JoAnns was having a few really good coupon days, so I took advantage of it by getting a few Springfield items I wanted.

First up, I had always roller blades for my doll.  I used to roller blade all of the time when I was younger, so I thought getting a pair for my doll would be perfect.  And they were on clearance so I thought they wouldn't be around anymore.


Here they are out of the package.  They are made completely out of cloth except the bottom part with the wheels.  And they are quite realistic with having the brake on only one skate.


The three straps unstrap and re-strap with a little hook and loop tape (Velcro).


They fit the doll quite well.  I did have to hold her up though.


This is the underside.  All of the wheels move and she can roll on the floor.


There are the roller blades!  I am glad to add them in to my collection!


The next item I bought was the soccer set.  I played soccer when I was younger, so I wanted this set too.
I was a bit excited and I forget to take a picture of the item still in the package, but all of the pieces were in a bag.  It came with the cleats, black knee high socks, and the soccer ball.


I really love the laces on the shoes.  They are made a thin vinyl material.  And the bottom of them are sort of ridged.


The soccer ball is made of a rubber material.  It is a bit small for the doll, but I really love the texture and look of it.  It makes a great addition to the set.


Here is Emily with the cleats and socks on.  And the ball being kicked with her feet.


And then as I realized I got the set, she needs an outfit to go with it!  A task for me to complete.  : )


 Have a wonderday!

Monday, June 22, 2015

Gonna Eat This Camping Trip!: Part 1


Cooler

Before we get started on making our food, first we will need somewhere to put all of our food!  I wanted to make a cooler that was big enough for the food, but still small enough to be for a doll.  I used the dimensions of 6 inches by 4 inches by 4 inches for my rectangle box.  I made a box, but you can just use a box you find!


I coated the box in foam that was similar to the color scheme on the tent (pink and orange).  I tried to do something fancy with the top, but I would like to try making one with a flat top next time.


I added handles on the side and it's a great height for doll to drag around.  I want to add some wheels to one side some time too.


And everything fits inside!  So if you want to fill your cooler stay tuned I have some awesome food ideas!

Have a wonderday!

Saturday, June 20, 2015

TENT POLES CAME!

You have no idea how excited I was when the UPS guy came to our door today.  I had no idea that Our Generation would be sending the tent poles via UPS, but appreciate it all so much!  The tent poles and connectors came in their packaging.


I think my tent is around 12 to 13 years old.  I'm not sure really.  I just know I've had it for quite awhile.  Here it is flat out of the bag it comes with.  Mine isn't really all that different from those out now, just mostly different coloring.

It's main color is orange, with pink sides and blue accents.


Putting the tent together is quite easy.  I remember it being kinda tricky the first time I put it together, but the rods a bit smaller than the set that came with the tent (the old rods are actually quite bent too, not sure what I am going to do with them yet)  But the new ones still fit perfectly.


The connector at the top holds it all together.


And here we have the tent!


The logo is on the left door.  Like I said it's over ten years old and this was the logo back then.


The doors open and you can tie them open.  For closing them, there is hook and loop tape (Velcro) to keep them closed.


Here is one side with the window down.


The back!


And the other side with the window open.  You can see inside of the tent.  The windows are a mesh material, just like on a real tent.


Here is picture of the inside, I just went crazy with taking pictures.


I cleaned Coconut today and she looks better than she has in quite a while.  And here she in the tent.


I added the sleeping bag I have that was also bought when the tent was.  I have a better look at it on this post.

It would comfortably fit two dolls if you want too.


I put Emily inside to show you how she fits inside.  I should have used a camera with a flash, but I hope to do a photo shoot outside with all of the fun camping things I have been working on lately.  I have a few more ideas to do too!


I am going to ramble for a bit now.  The reason I wanted to get new tent pole connectors and not just buy a new tent, was because this tent bought for me by my grandmother.  She was ecstatic when I got my American Girl doll.  She bought me a few outfits that Christmas I received her.  And she promised to make a tent for her when we were at JoAnns buying patterns to make clothes for her.  But she never got around to it, so she bought this for me.  About five years ago my grandmother was diagnosed with Alzheimer's disease.  Everything happened quickly after she was diagnosed.  She doesn't remember me anymore, but I feel that those moments we had like when she bought me this tent were special.  And that's why I was so happy when Our Generation said they would send the tent poles to me.  I hope they know how wonderful just that small gift of generosity was.

Have a wonderday!

Thursday, June 18, 2015

Hobby Lobby & Target Finds!

I ventured into Hobby Lobby for the first time and boy was an experience.  I actually went back later that night to get something else, but on to the finds.


First I will show you what I got at Target!  I found this bandanna which I thought would make the perfect table cloth for my picnic table.  I thought I would sew the ends to make it shorter later, but I was excited to find it!


I found this small set next, it was only $3.


It comes with two cups, two forks, two plates, and two pieces of cake.  The cake is actually pretty good sized along with the plates and forks.  The cups a bit big for the doll, but it's all good.


Now on to my finds from Hobby Lobby!  I had been looking for these for awhile now.  They are alligator clips for her hair.


Now as you know I have been working on my Camp It Up! items.  I realized I wanted a compass to add to the set I'm making, so when I found these I was quite excited!


As I was walking through the aisles, I found this little pail.  I thought it was perfect sized!  I thought it would be the perfect addition to my camping set.


If you have been following my blog, you know I am working on Sailor Moon and Sailor Chibi Moon, so I want to make their cat Luna.  I found these eyes for when I do sew that project.


And another thing I want to make for the Sailor Scouts is Sailor Chibi Moon's key, well Chibi-Usa's key.  That will be another task for later.


I also found the water scrapbook paper and new clear ruler!  But I figured you didn't need to see that.  That's it though!

Have a wonderday!