Saturday, August 29, 2015

Camp It Up!

As an end of the summer trip, Emily went on a camping trip!  I helped set up her camp site and then she had tons of fun cooking and sleeping in her tent!

Here I am setting up the tent and all of the supplies Emily will need!


And here are some pictures I took as well!  Enjoy!

001

002

003

004

005

006

007

008

009

010

011

012

013

014

015

I hope you enjoyed these pictures!  I had lots of fun doing my first photo shoot with Emily.

Have a wonderday!

Wednesday, August 26, 2015

Giveaway at Doll Diaries!

Hello everyone!  I am here to tell you about a giveaway over at Doll Diaries happening right now!

Doll Diaries was lucky enough to receive the brand new Beforever doll, Maryellen!  She is adorable and looks one of a kind!  And they are giving the doll away to one lucky winner!

If you would like to enter to win too, all you need to do is head over to DollDiaries.com and read the information on how to enter!  They have some beautiful pictures of Maryellen posted as well!

Have a wonderday!

Sunday, August 23, 2015

Backpack and Gear!

Hello everyone!  I am here bringing you another post all about the things I have for a backpack and the gear I stored inside of it!  I made most of the items with tutorials that were already available, but I did have to use my imagination for a few things!  So let's take a look and get started!


The first item is the backpack!  I used the free tutorial on this website!  She gives wonderful and precise instructions on creating this little backpack.  I wanted to practice my hand stitching, which is why it probably isn't the greatest looking, but it's sturdy and fun!  I loved sewing this!


It fits nicely on the doll's back too.  The straps are long enough to go over the dolls arms, and not look too big while it sits on the doll.


Now for the items in the bag!  I added a Molly book, so if she wants to sit down and read she can!  Then I added the First Aid Kit we made in a previous post!  Click here if you want to read through that post and see how I made any of the items in there.

Next I will talk about the binoculars!  I was trying to figure out how to make binoculars when I found a MyFroggyStuff tutorial.  It was prefect.  I just added a few of my own touches and it was done!  I love the color blue and thought the stars added a great touch!


The next thing I made was a flashlight.  I started to wrap paper around a toothpick and then wrapped more paper around and around.  It took a lot of paper, but I had the longer construction paper, so it went quite fast.  I added a couple of pieces of foam for the on and off switch!  I coated both the flashlight and binoculars in a few layers of Modpodge to make sure they were extra sturdy too.

I even was able to make the flashlight and binoculars match!


Whenever I went camping when I was younger, I loved looking at the maps of the different camp sites.  I made one for my doll!  It could even come in handy incase she gets lost while on a hike.


While in elementary school, Mark Herrick, an illustrator, visited our school.  He was responsible for drawing the pictures in the Buck Wilder series.  We got two of the books he illustrated and he even signed them!  The Buck Wilder books are all about hiking, camping, and fishing!  They teach safety and many do's and don'ts while in the outdoors.  We loved these books when I was younger, so I made a simple version for my doll!


I adore tiny books, and this one was so fun to make!


And now Emily is off to go on an adventure!


Have a wonderday!

Sunday, August 16, 2015

First Aid Kit!

Hello everyone!  I am here with another Camp It Up! post.  Now when you are camping, sometimes you get cut or trip on that branch you saw, but fell anyways.  So for those moments you will need to bring along your first aid kit!


I was thinking about what type of container I wanted to store my first aid kit in, and as I was looking through my box of random odds and ends I keep from around the house, I found an old floss container.

I took out the piece inside that held the floss.  If you do this, I would get a parent's help because of sharp objects.

I cut out the First Aid Kit label from the printable and taped it onto the container.


Now for our first aid supplies!  Most of a supplies I've made were made with printables I have available at the end of post!

I think the number one supply you will need is bandaids!  On the printable all you will need to do is cut them out and fold them over.  I coated them with clear package tape and done!


Here are some antiseptic cleaning wipes (alcohol wipes basically).  These are for when you have a cut and need to clean it.  I stuffed a small piece of foam inside to make it kind of squishy like the real packs are.  I used clear packing tape to make them shiny.


Next is a cold compress.  When your doll falls down and gets sprain, you need something cold to put on her ankle.  A cold compress is a pack that when you crush it it becomes cold.  I stuffed some cotton from a cotton ball inside to make it bulky.  I then used clear packing tape to hold it all together.


Now we have some Sanitizing hands wipes.  As before I put a piece of foam inside to give it the feel of something is inside.  And covered it with clear packing tape.


Next I made this small sunscreen bottle.  I rolled up some paper loosely and glued the ends together.  I then put some glue in one end and squished it.  I put some foam to make the cap.  I painted it, glued the label on, and coated it in Modpodge (you can use any clear glue).


I decided to add some bug spray to my first aid kit from my own experience of having those pesky bugs always hanging around me.  I started rolling up some paper around a toothpick and then about halfway through, I cut a shorter piece of paper and kept rolling it all up.  I glued a small piece of foam on the top for the nozzle.  I painted, glued on the label, and put on some Modpodge.


As I was looking at a few first aid kit lists, I found a few said lip balm.  So I rolled up paper around a toothpick and then painted the tiny rolled up paper tube.  I glued on the tiny label and painted it with Modpodge.


Finally, I decided to make a toothbrush and toothpaste.  I made the toothpaste container the same as the sunscreen bottle.  I just did it with a small scale.  The toothbrush was inspired by MyFroggyStuff's tutorial, but I think I did it a bit different.  I just cut some small foam pieces and glued them on a small popsicle stick, which I cut because it was too big.


And there we have it!  A first aid kit fit for your dolls.  The printable is located here:

Colored version
Black and white version

I, once again, gave you both options if you would like print the colored version I have or you can color your own!  If you have any questions just let ask me in the comments below.


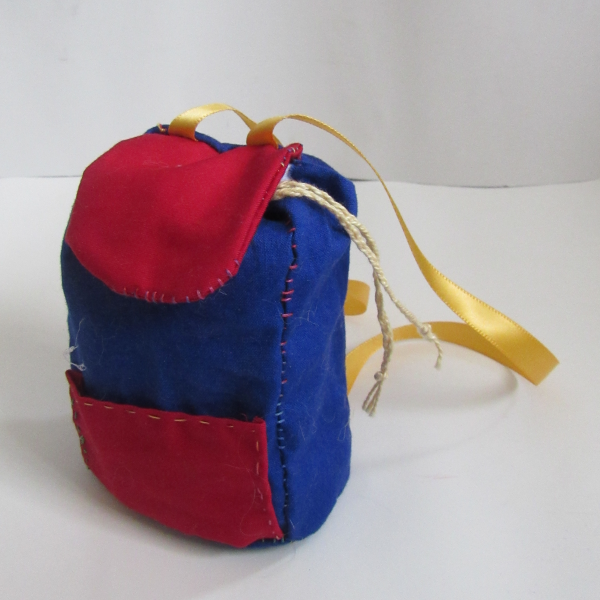
Next I have a fun backpack haul for camping and a few crafts to go inside!  Have a wonderday!

Friday, August 7, 2015

Washing Doll Hair!

Hello everyone!  As I was looking around the interwebs recently I stumbled upon watching videos where they wash doll hair.  I have never attempted this because American Girl is quite adamant about not doing it.  I caved though because I've owned my doll for a while now and her hair has gotten quite dirty.

I didn't take pictures of myself doing it because I was worried I would mess up and get water everywhere.  But I used the technique used in this video.


I used four pigtails, as she mentioned in the video for a Kit doll, and I put a small pigtail with her bangs.  My doll looked quite funny.

I just used the regular shampoo and conditioner I use and it worked fine.  I do have a few tips, some are mentioned in the video, but I thought I would make a list too!

  • Parent's permission!  If you aren't adult, you should either get a parent's permission or have an adult help you.
  • Towels!  Grab a towel or maybe two.  I used one to cover her face since it's quite important you avoid her eyes at all costs.  Make sure you are only getting her hair wet.  And don't do this too often because it can potentially loosen the glue holding the doll's wig on.
  • Warm water!  I found that using the warm water really helped.
  • Remove clothing!  I forgot this step, and her shirt got wet.  It wasn't a big deal, but I thought I would let you all know.
  • A little dab will do ya!  Yeah, that old glue saying is coming back atcha.  Try not to use a lot of shampoo or conditioner.  I used about a quarter sized amount for her four ponytails and then I did add a bit extra conditioner on her ends because they were quite dry.
  • Rinse it all out!  When washing the doll's hair make sure you rinse it all out.  It's sort of easy to tell if you left any in, just rub your hands through the strands of hair.  Re-rinsing the doll's hair is always an option if you didn't get it all.
  • Quicker drying time!  If you want her hair to dry quicker, put your doll in front of fan.  I laid her down just as she did in the video on my bed.  I would also suggest don't set her directly in front of a fan, but a bit further away.  My doll's hair dried in probably a fourth of the time.

So that's it!  Those are the tips I found while I did it myself.  Some of them may have been repeated from the video, but I just wanted to make a list for myself.

Here are some pictures of my doll's hair after her washing and conditioning.


I have started to look up some tips about splitting ends.  If you have any tips leave a comment and let me know.

Have a wonderday!