

Two quick notes before we get started!
- This craft may need the assistance of an adult if you use certain equipment, such as a hot glue gun or sand paper.
- When creating my fire pit, I wanted to be able to reuse the tea light. That is why I used two circle disks. I wanted to be able to put one inside of the other. If you wish to just glue a tea light to the middle of one big circle or you don't have one, then you can just cut out the big circle. On with the show!

What You Will Need:
Paperboard/Cardboard or Lid/Lids
Glue
Paint
Scissors
Sticks
Sandpaper (optional)
Tissue paper/foam (I ended up using tissue paper, but I put foam in the picture)
Ruler (not shown)
Steps:
1. Now for my craft I used paperboard, but if you wish you could use a disposable lid from a container (a Pringles can, butter container, or anything you would think is big enough to make the fire how you want it.)
First draw two circles, I made one slightly smaller than the other so it would fit inside. (I believe my bigger circle had a diameter of about 4 1/2 and the other was just slightly smaller.)

And then I cut out multiply copies of each circle. I had four bigger circles and two smaller ones.
2. I glued the circles together and put something heavy on them so they would dry flat.


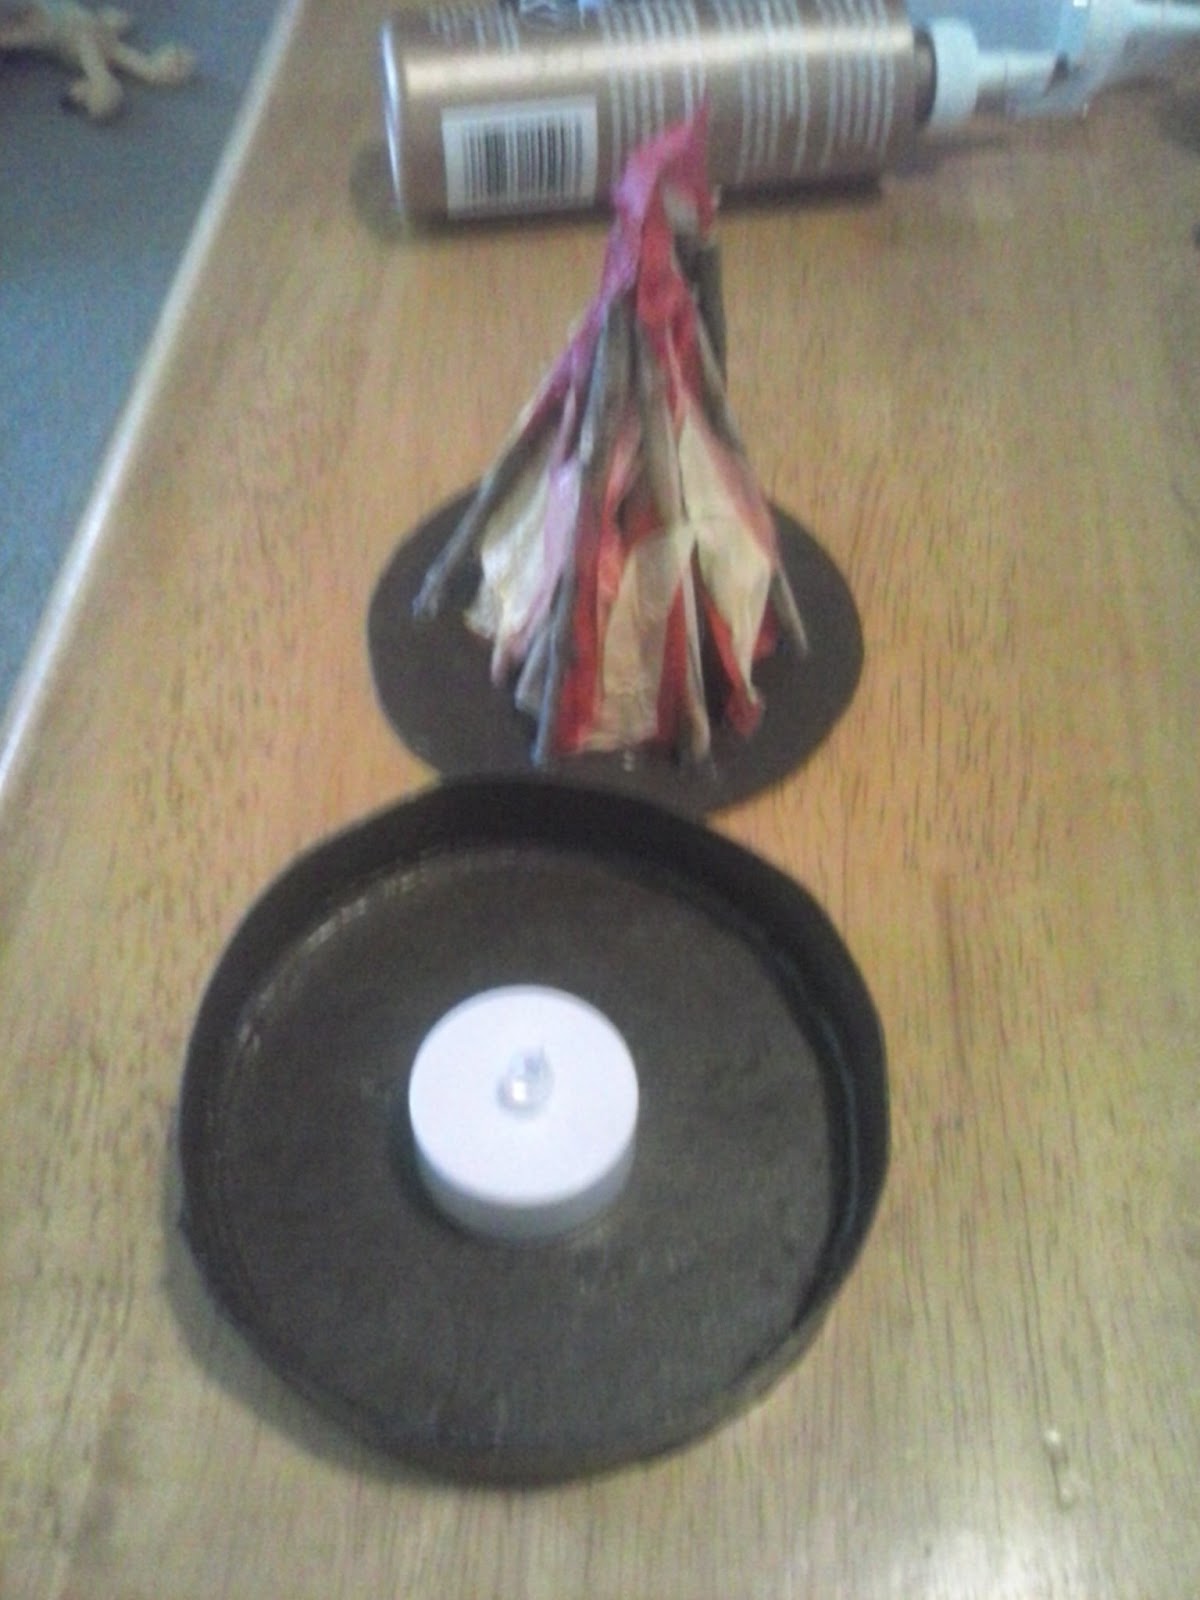
3. On the smaller circle draw a small circle and cut it out. I traced the tea light I was going to use as the "flame." If you do not have a tea light or "flame" then you can just omit this part.

4. Next is making the sides to glue onto the bottom bigger circle. I figured out the circumference by doing some math, but you can just cut a strip and measure it that way. I believe I made mine about an inch high, but you can make yours how ever high you would like.

I glued the two ends together making sure it was tight around the disk. I held it together with a clothes pin until it was dry.
Crafty Note: Instead of making the strip, you could also glue some rocks around the edge for a fun nature affect.

5. Next I started to assemble the fire pit. I glued the circle strip around the bottom edge of the bigger circle. You can probably use any kind of glue, but I decided to use the glue gun on this part to make it faster.

6. Paint! I painted the inside of the pit brown, along with the small disk as well (both sides!). I then painted the outside of it a darker brown.

7. Now comes the fun part where it will finally going to start looking like a fire pit! Take a buddy, my dog went with me, and find some sticks outside.
Crafty Note: If you don't have any available sticks that is alright, grab some Popsicle sticks or toothpicks or take the fluff off a Q-tip and paint them. With your imagination anything is possible!

I personally sanded down my sticks. I didn't want the particles from the dead wood getting everywhere when I stored it. For picture taking purposes I showed myself sanding inside, but make sure you have a vented area when sanding and wear protective covering. I went outside to really sand my down. Again, had my buddy with me.

8. Glue your sticks onto the smaller disk with the hold cut out. I put the tea light in the middle so I knew how I wanted it to go. Again I used hot glue for this part, but I think I would have preferred a clear drying liquid glue. Although I hope it will last longer with the hot glue.
Crafty Note: I wanted to be able to reuse my tea light, so I didn't glue the sticks to it. If you would like to glue them to the tea light that is your decision.

Rearrange your sticks however you would like. It's really up to you!
9. Now we need some flames! Unless you like how it looks and want to stop, cool. If not, let's keep moving forward! As I mentioned at the top, I used tissue paper to make my flames.
I went to my craft supplies and realized I didn't have the colors I needed, but worry not. I had white! I painted the tissue paper the colors I needed: red, orange, and yellow. It looks awesome because you can't put a thick layer of paint on, so you can still see the tea light flame through it.
I took some white school glue (doesn't really matter what kind) and mixed it with some water. I used a paint brush to put the glue on the sticks and carefully started to arrange how I wanted the fire to look. I added the red, then orange, and finally yellow.

I did get frustrated a little when I was doing this part, but it looks great when it dried.
10. That's it! Add your tea light in the middle and you have a roaring camp fire! Grab your marshmallow roasting sticks and guitar for a fun night at the camp fire! If you have any questions leave them below and I will get to them as soon as I can!

Here is the camp fire in action!
No comments:
Post a Comment